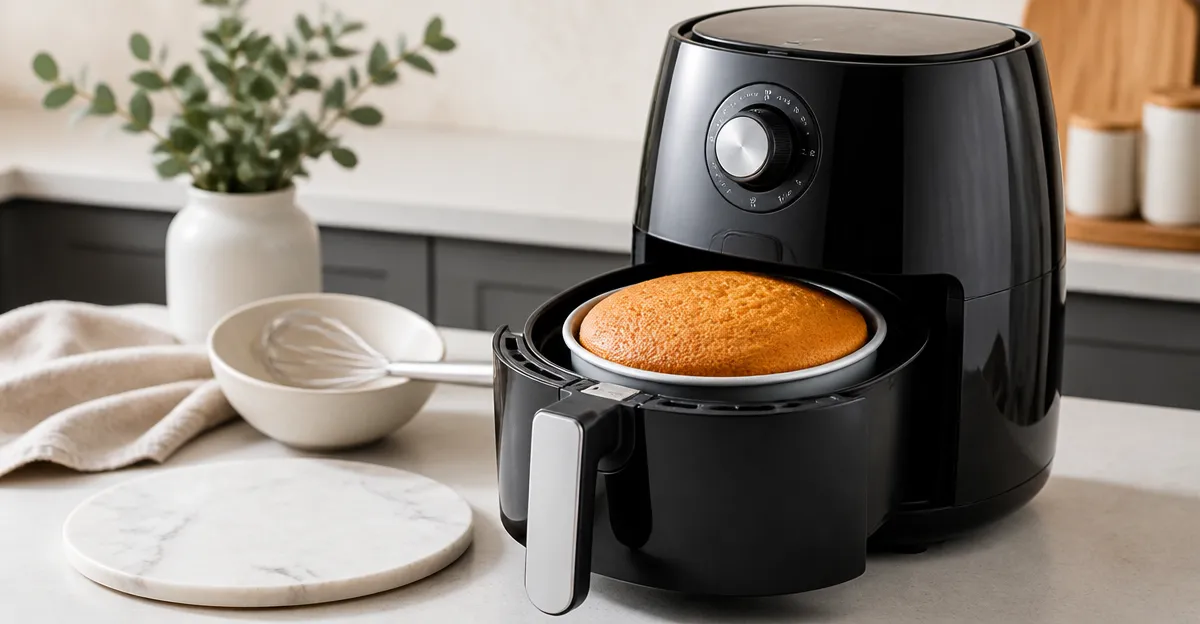
How to Bake a 6‑Inch Cake in a Mini Air Fryer: Step‑by‑Step Guide and Which Models Fit
Introduction
One can achieve bakery‑quality results without a full‑size oven by using a compact air fryer. This guide explains how to bake a 6‑inch cake in a mini air fryer, covering batter preparation, pan selection, temperature control, and finishing touches. The reader will learn why a mini air fryer can produce even browning, reduced energy consumption, and quicker cleanup. Understanding the interaction between pan material and hot‑air circulation will enable consistent, professional‑looking cakes for birthdays, celebrations, or everyday indulgence.
Choosing the appropriate tools is essential because the limited interior space of a mini fryer demands precise sizing and heat distribution. The guide references several highly rated Amazon products that meet these requirements, yet the techniques remain applicable with any comparable equipment. By following each step, one can avoid common pitfalls such as uneven rise, soggy centers, or over‑browning. The result is a moist, evenly layered cake that can be decorated or served plain.
What You’ll Need
- 6‑inch round cake pan (aluminum or stainless steel) – see product recommendations below.
- Mini air fryer (2.6‑qt or larger) with temperature control up to 400°F.
- Standard cake batter ingredients (flour, sugar, eggs, butter, leavening, flavorings).
- Silicone spatula, mixing bowls, whisk, and a kitchen thermometer.
- Optional: parchment paper, cooling rack, and decorating tools.
Step 1: Prepare the Batter
Begin by measuring all dry ingredients into a bowl; sift flour, baking powder, and a pinch of salt to ensure a light texture. In a separate bowl, cream softened butter with granulated sugar until the mixture becomes pale and fluffy, a process that incorporates air for a higher rise. Add eggs one at a time, beating well after each addition, then blend in vanilla extract or other flavorings. Finally, combine the wet and dry mixtures, stirring just until no streaks remain; over‑mixing can develop gluten and produce a dense crumb.
At this stage, the batter should have a pourable consistency, similar to a thick pancake batter. If the batter appears too thick, incorporate a tablespoon of milk or water; if too thin, add a small amount of sifted flour. Using a kitchen thermometer, verify that the batter temperature is around 70°F, which promotes uniform baking in the air fryer’s rapid‑heat environment.
Step 2: Choose the Right Pan
For a 6‑inch cake, the pan must fit comfortably inside the air fryer basket while allowing air circulation around the sides. The Wilton 6‑Inch Round Cake Pan is constructed from anodized aluminum, which provides superior heat conduction and reduces the risk of over‑baking. Priced at $8.49 and rated 4.7/5 from over 24,000 reviews, it offers a budget‑friendly option with a 2‑inch depth suitable for layered cakes.
Alternatively, the E‑far 6‑Inch Cake Pan Set includes three stainless‑steel pans that are non‑toxic, rust‑resistant, and dishwasher safe. Stainless steel distributes heat more slowly than aluminum, which can be advantageous in a mini air fryer that tends to run hot; the set costs $14.99 and holds a 4.7/5 rating from 5,000 reviewers.
For a removable‑bottom option, the HIWARE 6‑Inch Springform Pan provides a non‑stick coating and a leak‑proof design, useful when baking delicate cheesecakes or when a clean release is paramount. It is priced at $11.99 with a 4.6/5 rating from nearly 40,000 users.
When selecting a pan, ensure the outer diameter does not exceed the air fryer basket width; a 6‑inch pan typically fits in both the Dash Tasti‑Crisp (2.6‑qt) and the Cuisinart 4.5‑qt models.
Step 3: Prepare the Pan for Baking
Lightly grease the chosen pan with butter or a neutral‑flavored oil, then dust with a thin layer of flour, tapping out excess. This traditional method creates a barrier that prevents sticking and facilitates an even crust. For the non‑stick HIWARE springform, a quick spray of cooking spray is sufficient; the double‑layer coating eliminates the need for flour dusting.
Line the bottom with a small circle of parchment paper if the pan’s surface is not fully non‑stick. The paper adds an extra safeguard against sticking, especially when using the aluminum Wilton pan, which may develop minor adhesion over repeated use.
Once prepared, pour the batter into the pan, filling it no more than two‑thirds full to allow for rise. Smooth the top with a silicone spatula to create an even surface, which promotes uniform browning during the air‑fry cycle.
Step 4: Set Up the Mini Air Fryer
The Dash Tasti‑Crisp 2.6‑Qt Air Fryer offers a compact footprint ideal for single‑serve or small‑batch baking. Its analog dial allows temperature selection up to 400°F, and the 30‑minute timer provides sufficient cooking time for a 6‑inch cake. Priced at $49.98 with a 4.5/5 rating from 33,000 reviews, it is well suited for kitchens with limited counter space.
If a larger capacity is desired, the Cuisinart 4.5‑Qt Air Fryer delivers a 4‑function appliance (Air Fry, Roast, Bake, Keep Warm) and includes a viewing window, making it easier to monitor cake rise without opening the basket. It costs $59.99 and holds a 4.7/5 rating from 893 reviewers.
Preheat the air fryer to 320°F; this temperature is lower than conventional oven settings but ensures the cake cooks through without excessive crust formation. Preheating for three minutes creates a stable thermal environment, which is critical for even leavening.
Place the pan on the air fryer basket’s rack or directly on the basket surface, depending on the model. If the basket has perforations, a silicone baking mat can be positioned underneath to prevent batter from leaking through.
Step 5: Bake the Cake
Insert the basket into the air fryer and set the timer for 20 minutes. Halfway through the cycle (at the 10‑minute mark), pause the machine and rotate the pan 180 degrees; this compensates for any hot‑spot variance and promotes uniform rise. The Dash model’s analog dial does not provide a beep, so the user must watch the timer manually.
After the timer expires, insert a toothpick into the center of the cake; if it emerges clean or with only a few moist crumbs, the cake is done. If the toothpick shows wet batter, continue cooking in two‑minute increments, checking after each interval.
Once baked, allow the cake to rest in the pan for five minutes; this brief steaming period stabilizes the crumb structure. Then, carefully release the springform (if using HIWARE) or gently lift the pan onto a cooling rack. Let the cake cool completely before frosting to avoid melting the icing.
Tips & Pro Tips
- Use a kitchen thermometer to verify the air fryer’s internal temperature; some units may run hotter than the displayed setting.
- For added flavor, incorporate a tablespoon of melted butter into the batter; the butter will melt quickly in the hot‑air environment, enriching the crumb.
- When baking multiple layers, consider using two pans simultaneously if the air fryer’s capacity permits, rotating them halfway through the bake.
- To prevent a dry top, place a thin sheet of aluminum foil loosely over the pan during the final five minutes of cooking.
Troubleshooting
Problem: Cake rises unevenly, creating a domed top.
Solution: Reduce the temperature to 300°F and increase the baking time by 5‑7 minutes. The lower heat allows the cake to rise gradually, producing a flatter surface suitable for frosting.
Problem: Cake sticks to the pan.
Solution: Ensure the pan is well‑greased and flour‑dusted, or switch to the non‑stick HIWARE springform, which eliminates the need for additional greasing.
Problem: Crust becomes too dark before the center is cooked.
Solution: Cover the cake loosely with a piece of parchment or foil after the first 15 minutes of baking; this shields the top while the interior continues to set.
Conclusion
By following this systematic approach, one can reliably bake a moist, evenly textured 6‑inch cake using a mini air fryer. Selecting the appropriate pan—whether the anodized aluminum Wilton, the stainless‑steel E‑far set, or the non‑stick HIWARE springform—ensures optimal heat transfer and easy release. Pairing the pan with a compact air fryer such as the Dash Tasti‑Crisp or the more versatile Cuisinart model provides precise temperature control and convenient monitoring.
With these tools and techniques, the reader can create bakery‑level cakes for celebrations, experiment with flavors, and enjoy the efficiency of air‑fry baking. The guide encourages further exploration, such as adding fruit purées to the batter or experimenting with gluten‑free flour blends, confident that the foundational process remains robust.
Frequently Asked Questions
What temperature should I set my mini air fryer to when baking a 6‑inch cake?
Preheat the air fryer to 320°F (160°C) and bake the cake at that temperature for consistent rise and browning.
Which pan size and material work best for a 6‑inch cake in a mini air fryer?
Use a 6‑inch round silicone or metal springform pan that fits comfortably with at least ½‑inch clearance around the edges.
Can I use any mini air fryer model to bake a 6‑inch cake?
Any mini air fryer with an interior width of at least 7‑8 inches and temperature control down to 300°F can accommodate a 6‑inch cake.
How do I prevent the cake from over‑browning on the top?
Cover the cake loosely with aluminum foil halfway through baking or lower the rack to reduce direct hot‑air exposure.
Do I need to adjust the baking time compared to a conventional oven?
Yes, reduce the typical oven time by about 20‑25% and start checking for doneness at the 20‑minute mark.